Quality Control: Inline and on time
 Automated inline measuring makes quality control easy and effective
There are several important aspects involved in automated inline (or near-line) measurement systems, including leveraging adaptable metrology methods, developing intuitive software, and enhancing automation. The measuring equipment, automation software and the machine need to communicate with one another effectively in order to meet quality assurances.
Many metrology companies are partnering with automation companies and combining their capabilities to make complete automated inline systems. These systems provide shop owners with one-stop shopping as well as seamless connectivity between system components.
However, some shops and facilities have automated cells already be in place. This is why some companies are focusing on developing metrological devices that are easily adaptable to a wide range of automation scenarios and software that can connect to existing systems, while providing high-data capture rates.
“In-process data monitoring allows updating offset data to multiple CNC machine tools automatically, which provides error free tool control, eliminating operator data entry errors, making lights out manufacturing possible,” says David Chang, technical sales manager (measurement & automation products) for Renishaw (Canada) Limited.
As both visual inspection and measuring technology improve, the opportunities for efficient quality assurance on shop floor environments look promising. Inline measuring linked to a closed-loop production system ramps up productivity with the added advantage of real-time quality assurance.
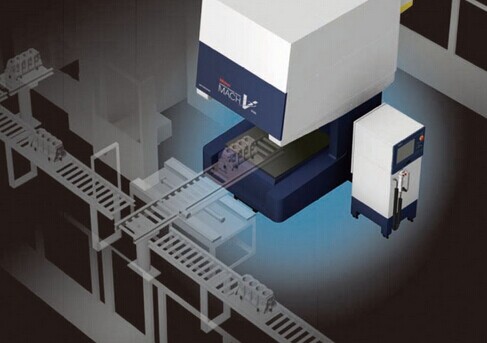
Japan-based Mitutoyo, specialists in precision measuring systems, supply high-quality measuring equipment that co-operates fluently with a partnered automation robot from Netherlands-based Cellro. Together Mitutoyo and Cellro have created an integrated system, the Automatic Inline Measurement, using the MACH series of measuring systems, with the Xcelerate automation system, which enables automatic real-time feedback correction of CNC machines, and data is documented providing exact measurement reports.
QUALITY CHALLENGES ON THE SHOP FLOOR
Each production environment is different, so it’s important to understand the type of inspection needed to ensure quality assurance. While automated inline measurement systems can offer feedback process control, these systems can also allow for part sortation, where after inspection a robot is able to remove defective parts from the line. In many cases both applications of the system are used in conjunction and allow for improved quality assurance on a production line.
Conroe Machines, Inline
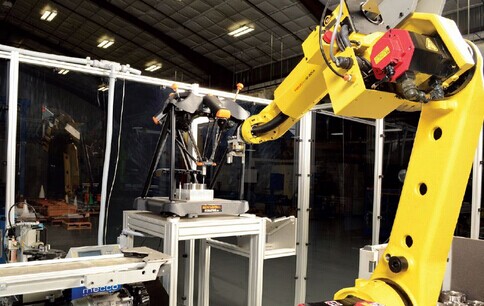
 Conroe Machines integrated the Renishaw Equator system in an automated cell, including a 6-axis robot, machining centre, and an engraving machine
Conroe Machines, a general-purpose shop in Conroe, Texas, gets a high percentage of its business from the oil and gas industry, specifically drilling components like bearings.
In a case study published by Renishaw, James Wardell, a CNC programmer with the Conroe, speaks about the challenges the company faced when dealing with quality.
“Our production plateaued at 800-1,000 parts per day…We had a single operator loading the machines and inspecting the parts. However, you can rely on an operator to correctly inspect so many parts with this kind of volume, and we needed more output.
“Inspection must be fast to keep up with cycle times on the parts…Originally, we looked at white light laser inspection because of its speed, but the parts are too reflective. We also looked at hard gauging and shop-floor CMMs. Hard gauging was very expensive and required setup attention, and the CMM gave no speed advantage,” explains Wardell.
To enhance its quality process Conroe Machines elected to use the Renishaw Equator gauging systems in an automated cell, including a 6-axis robot, machining centre, and an engraving machine.
“We planned the measurement process to work without a part fixture or stylus changing. The robot chooses, through the EZ-IO automation software on the Equator, which measuring program it will run for each type of part,” says Wardell.
A traditional, dedicated system can be highly customizable for a specific part, which can make measuring multiple parts challenging. As more and more shops are moving towards “just-in-time” manufacturing, there is more than one type of part being produced at a time. Pre-programmable software allows for collected data and measurements to be directly compared to CAD models or real-time model-based algorithms. Software has also adapted to allow for unique scripts to be written for each part, making the inline system highly adaptable.
In this way, the measuring device is knowledge driven and can operate through a wide range of production processes.
BODY-IN-WHITE APPLICATIONS
Every industry has specific quality parameters to operate within. Finding a targeted system that fits the production line is key. In the automotive sector, it is important for complex and repeatable measuring. If there are 1,000 vehicles being produced daily, adding robotics, sensors, and measuring devices inline significantly increases the number of cars measured, thus creating a productive environment.
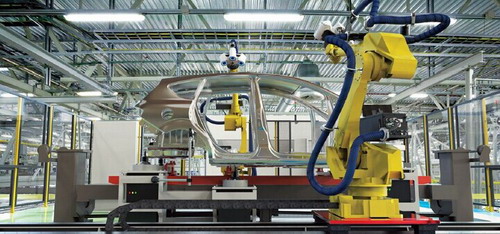
Hexagon Metrology, a Swedish-based company focusing on precision measuring technologies, has developed the 360º Smart Inline Measurement Solutions (360º SIMS) with the automotive industry specifically in mind.
The ability of the system to work with commonly used robots is helpful if there are existing systems in place, allowing for flexibility when setting up cell systems. For large part and mass production manufacturing, configuring cells within the production line using multiple robots can provide a full view of dimensional quality while measuring hidden components.
 Hexagon Metrology’s 360° Smart Inline Measurement Solutions.
Highly accurate data at the early production stages, like body in white measuring, is required before a vehicle moves down the line. Body in white refers to the stage when the car body’s sheet metal components have been welded together, but before moving parts, the motor, chassis sub-assemblies, or trim have been added and before painting.
For automotive assembly and manufacturing, this stage is significant.
For metrology companies, it’s important that the automated inline measuring systems are able to “demonstrate the locations of [all] holes, slots, studs, welded lines, and features,” according to Nikon metrology, a Nikon Group company. Nikon has developed the Laser Radar for automate inline inspection, mounting the laser to 6-axis robot arms. The measurements need to be precise in order to meet with stringent tolerances and continue along the production line.
Having fixed sensors only allow for detection of present or absent features in a local reference point, whereas automated inline measurement systems provide dynamic measuring and correction on the production line, especially when there is more than one vehicle type being measured. These systems are adaptable and require no changeover when it comes to measuring different features, parts, or vehicles.
Automated inline measurement works well in high-volume manufacturing where defects and time-consuming measuring can cause backlog in production. However, this type of system also works well in large part production, where a CMM or hand gauge is unable to measure beyond a specific size.
In the automotive industry, inline measurement is one of the few ways to ensure quality. Having a fully integrated system allows for full surface inspection and parts measurement within the production cycle time and can provide “insightful and actionable information and monitor quality,” says Giacomo Barita, head of Hexagon Metrology’s automated solutions.
The intelligent software provides users with the ability to specify the parameters for data collection, while analyzing the outcome for appropriate action. Whether you are using a system to correct manufacturing processes or remove defected parts, the ability to measure inline during continual production is key to a system’s success. Waste is reduced while processes are improved.
The goal of any shop, large or small, is to produce quality products efficiently. Quality assurances depend largely on the industry and customers, but one thing is certain, if the manufacturing process is producing defective pieces, a company will lose money.
Investing in a system that suits the needs of the assembly line will pay for itself when it comes to reducing waste both in materials and in time.
1.The news above mentioned with detailed source are from internet.We are trying our best to assure they are accurate ,timely and safe so as to let bearing users and sellers read more related info.However, it doesn't mean we agree with any point of view referred in above contents and we are not responsible for the authenticity. If you want to publish the news,please note the source and you will be legally responsible for the news published.
2.All news edited and translated by us are specially noted the source"CBCC".
3.For investors,please be cautious for all news.We don't bear any damage brought by late and inaccurate news.
4.If the news we published involves copyright of yours,just let us know.
Next Schaeffler Group USA Invests $163.8 Million To Expand Three South Carolina Manufacturing Plants
BRIEF INTRODUCTION
Cnbearing is the No.1 bearing inquiry system and information service in China, dedicated to helping all bearing users and sellers throughout the world.
Cnbearing is supported by China National Bearing Industry Association, whose operation online is charged by China Bearing Unisun Tech. Co., Ltd.
China Bearing Unisun Tech. Co., Ltd owns all the rights. Since 2000, over 3,000 companies have been registered and enjoyed the company' s complete skillful service, which ranking many aspects in bearing industry at home and abroad with the most authority practical devices in China.


